5-Minute Quick Start
This guide walks through the core Aurora workflow: import data, create a map, build a dashboard, and share.
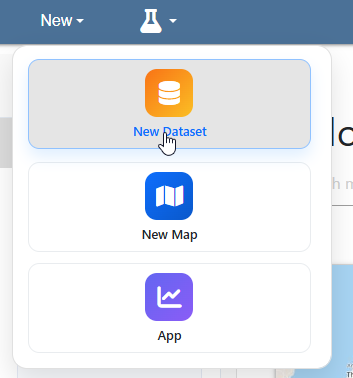
Step 1 - Import data
On the top menu, go to New > New Dataset
On the Create Feed page, give your dataset a name
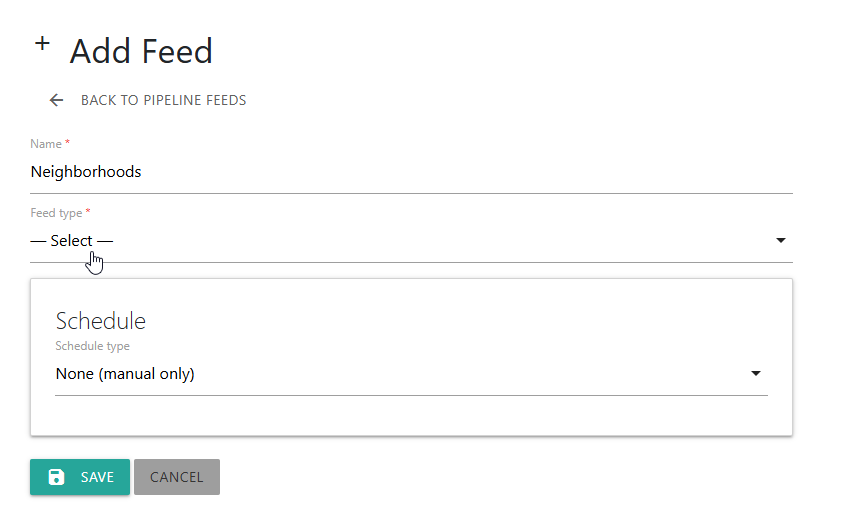
Select type (we’ll upload a zipped shapefile, neighborhoods.zip for our example)
Decide if import is a one-off or Scheduled (we’ll do a one-off)
Click the Upload button

On the home page, we see our dataset has been created
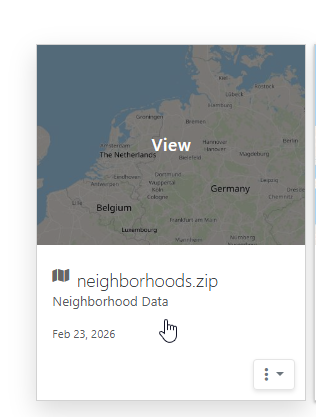
Click the card to view the dataset
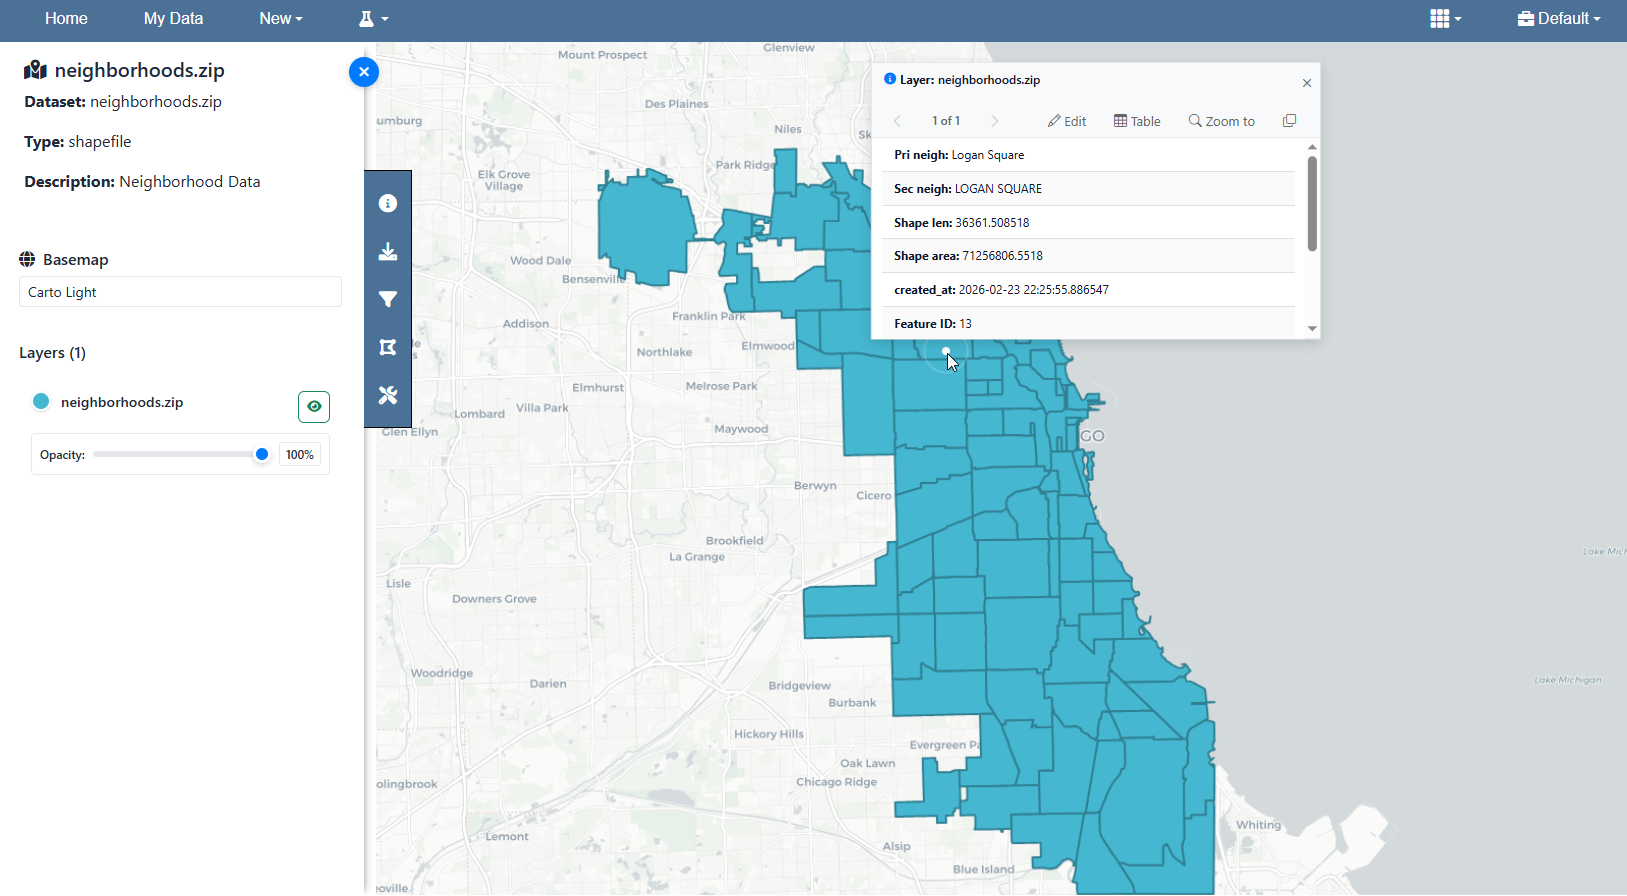
Step 2 - Create a map
On the left menu, click Settting.
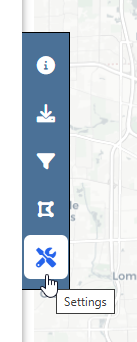
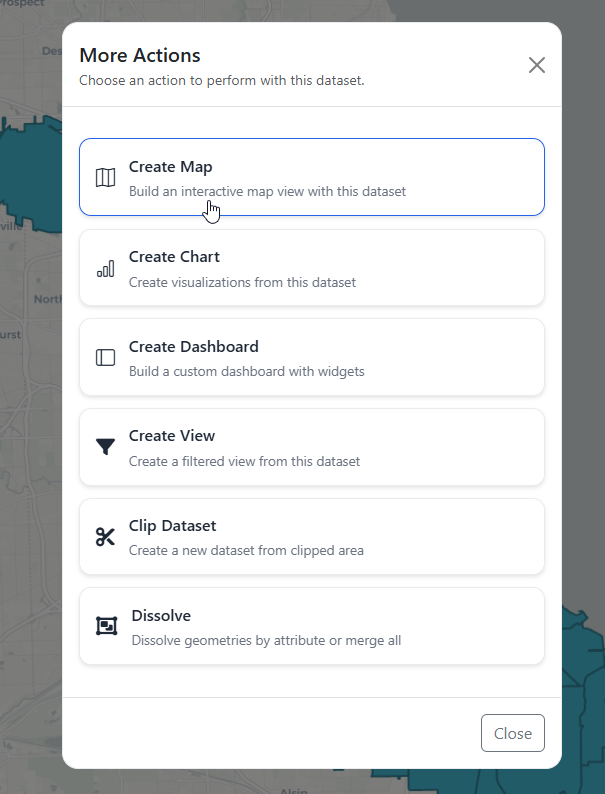
Click More Actions > Create Map
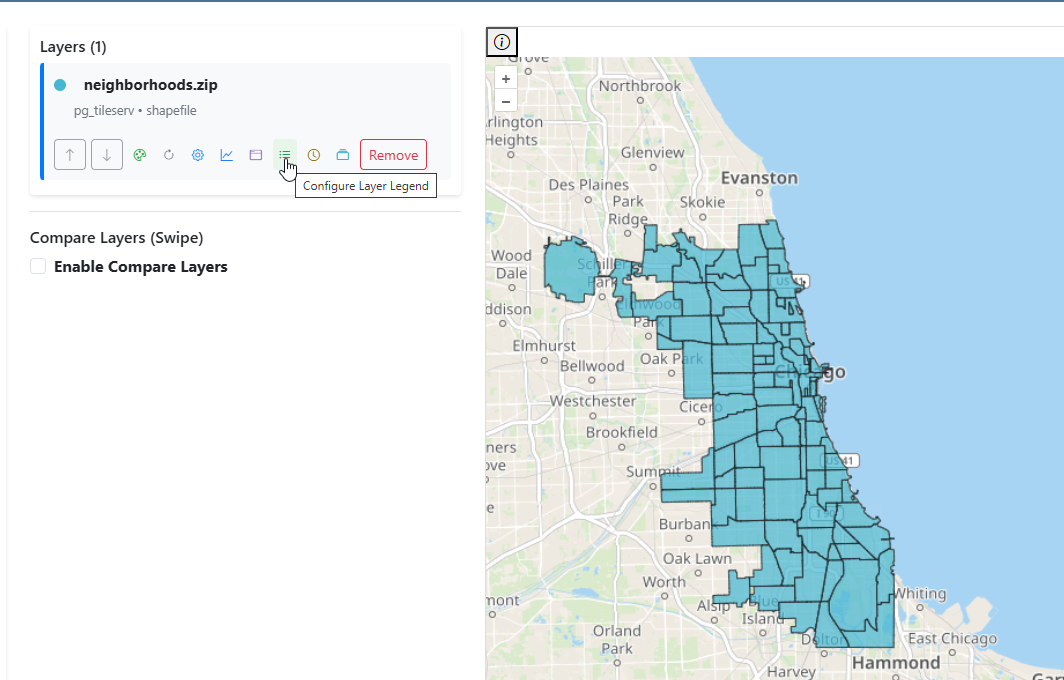
Your layer is added to the map. Add any additional layers you wish to as well.
Step 3 - Style layers
Style the layer(s) as you wish to and add additional features such as Legend, Charts, Popup Styling, etc..
Click Save Map
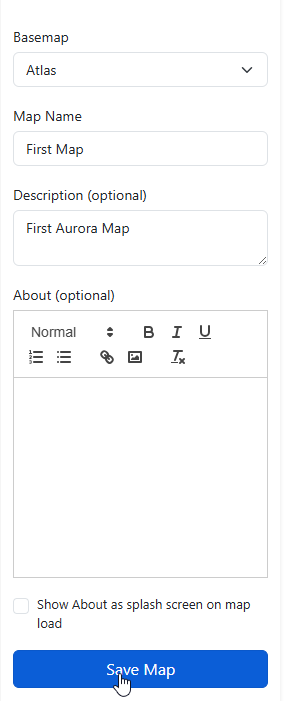
Your Map has been created.

Step 4 - Build dashboard
Create charts and link them to the map.